
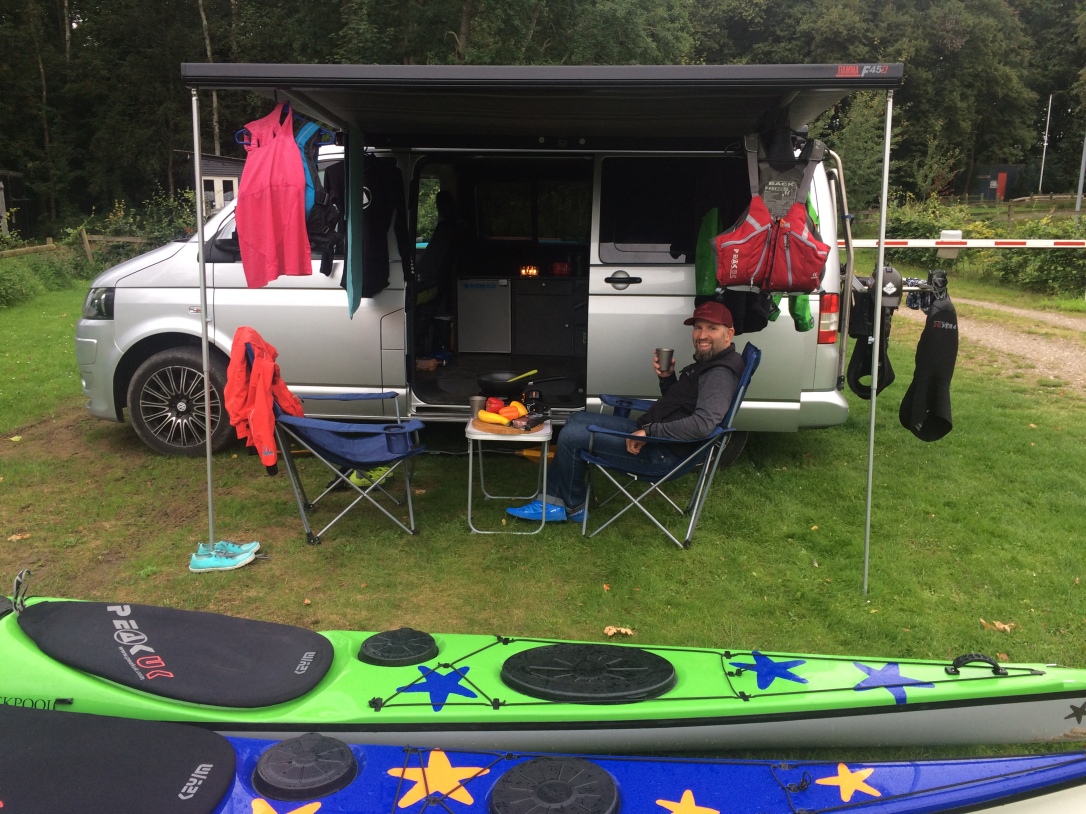
When I began Live2Flow it became clear I would need a strong four wheeled companion to support me. It needed to have the capacity to shift a stack of multisport gear, carry me and a number of clients in comfort and ideally also act as my mobile home. Oh, and I also wanted car like performance, decent fuel economy, good reliability levels and, in a perfect world, something that I would be proud to be seen at the wheel of. In short, I needed a custom VW T5.
I’m now on the second iteration of the vehicle I affectionately refer to as ‘The Dub’ and wherever I travel people express an interest in how I have adapted the van to my purposes. Each van was bought as a straightforward VW T5 Panel Van and each custom converted, but now that I am on MkII I have been able to make a few adjustments to the set up based on lessons learnt from MkI and feel that I now have a truly versatile Adventure Sports Camper almost perfect for my needs.
PART TWO: INTERIOR
Is that real leather?
No is the answer, but there is a good reason for that and it is nothing to do with being squeamish about animal skins. I’ve preferred to opt to have the seats covered with hard wearing, wipe clean vinyl, which has served me very well. No worrying about covering the seats when I jump in to run a shuttle in wet kit. I often toy with the idea of a pair of ‘captain’s’ seats but then I remember how useful the bench seat is; handy storage underneath, folds flat when not in use and allows 3 to travel in the front with the rear full of boats and kit – what is not to like?

Living in a metal box…
There are a number of elements that underpin any camper conversion. Practical waterproof textured vinyl flooring laid throughout proves extremely durable. The rear bulkheads need to be insulated, ply lined and covered in hardwearing, short pile carpet. This works out well and, although it can occasional fall foul of fluffing where abrasive boat hulls rub against it, I am reminded how important it is every time I physically come into contact with the van, especially when it softens the impact on my baldy head!! Finally, I prefer to have heavily tinted privacy windows fitted on both sides plus a tinted tailgate window. This has proved to be the best of both worlds; loads of light and views for rear passengers but still high levels of privacy when camping. In fact, I now don’t bother to fit blinds to the windows trusting instead to the fact they are almost completely opaque unless the inside of the van is lighter than outside – I just have to remember the rule ‘lights off before stripping off’!

Hmmmm, soft, comfy bed…
At the very beginning my first ‘campervan’ was really ‘camping in a van’ as we made do with inflating an airbed on the deck. This was ok but we always had bigger plans and after some time we invested in a ¾ RIB seat/bed. This was not a cheap option, but I have no regrets; as a seat it is crash tested with full seat belts and then it quickly shifts to a highly adjustable, super comfortable bed with minimal faff. Incredible the difference it made, not only in terms of sleeping comfort and passenger carrying, but also adding structure to the rear of the van and bizarrely, improving storage capacity by accessing the vertical space (it also has a cavernous space underneath it for storage). It is now 6 years old, has been moved from Dub MkI into Dub MkII and is still going strong.
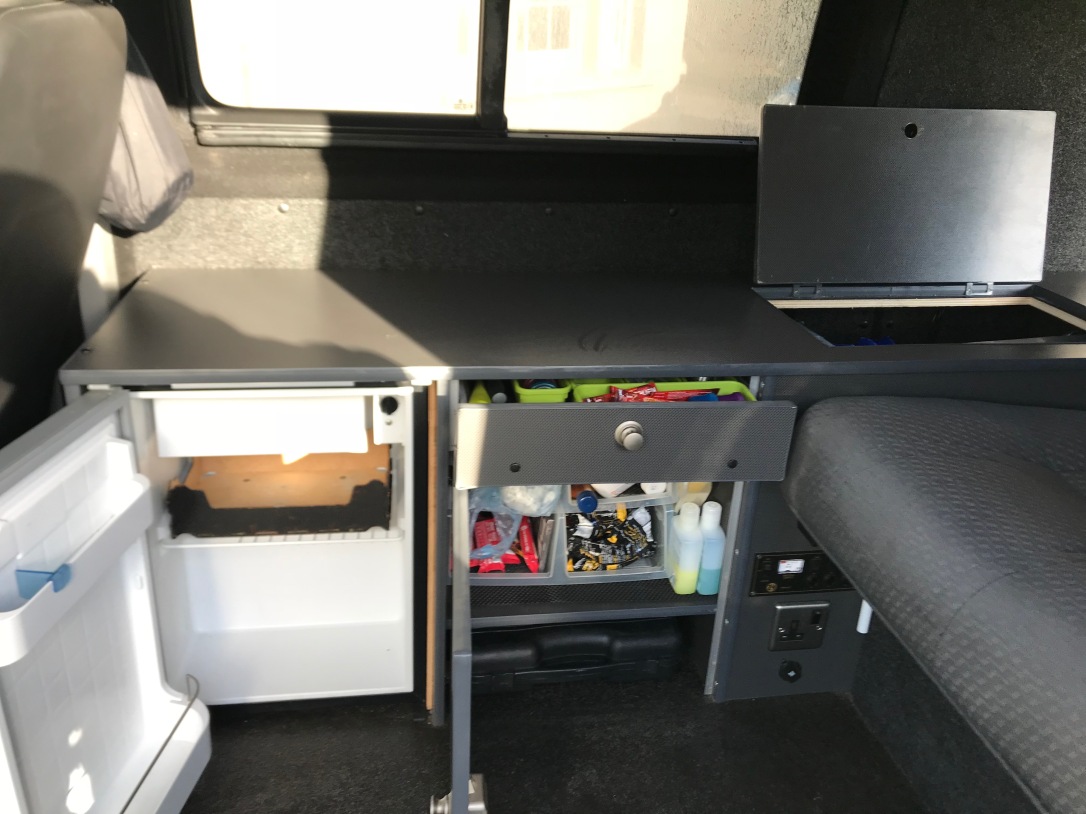
Where does this go?
Committing to my storage outfitting took some thought and research to get the exact specification right. It then took some time to find a conversion expert who could turn my ideas into reality and eventually I turned to Nomad Campervans. Nomad seemed to quickly understand my bespoke requirements and managed to turn my descriptions into a nicely finished reality. I wanted the units to be the same height as the bed when folded flat to maintain the option of having a full width flat loading bay for multiple kayaks when travelling. However, when in camping mode the units have a number of deep, top accessed hatches and a side accessed cupboard and drawer that house all of the camping items I need. There is no fixed stove as I preferred instead to use a mobile unit on the work surface and I didn’t want the complications of a sink and tap units, but I did have a fridge fitted to ensure fresh food can be stored. It is now still not a pure campervan but it is worth the slight compromise to keep the costs low, the design simple and the load capacity and flexibility high.
Power on…
The devil is in the detail…
Here are a few of my favourite little investments that make all the difference to living in ‘The Dub’.
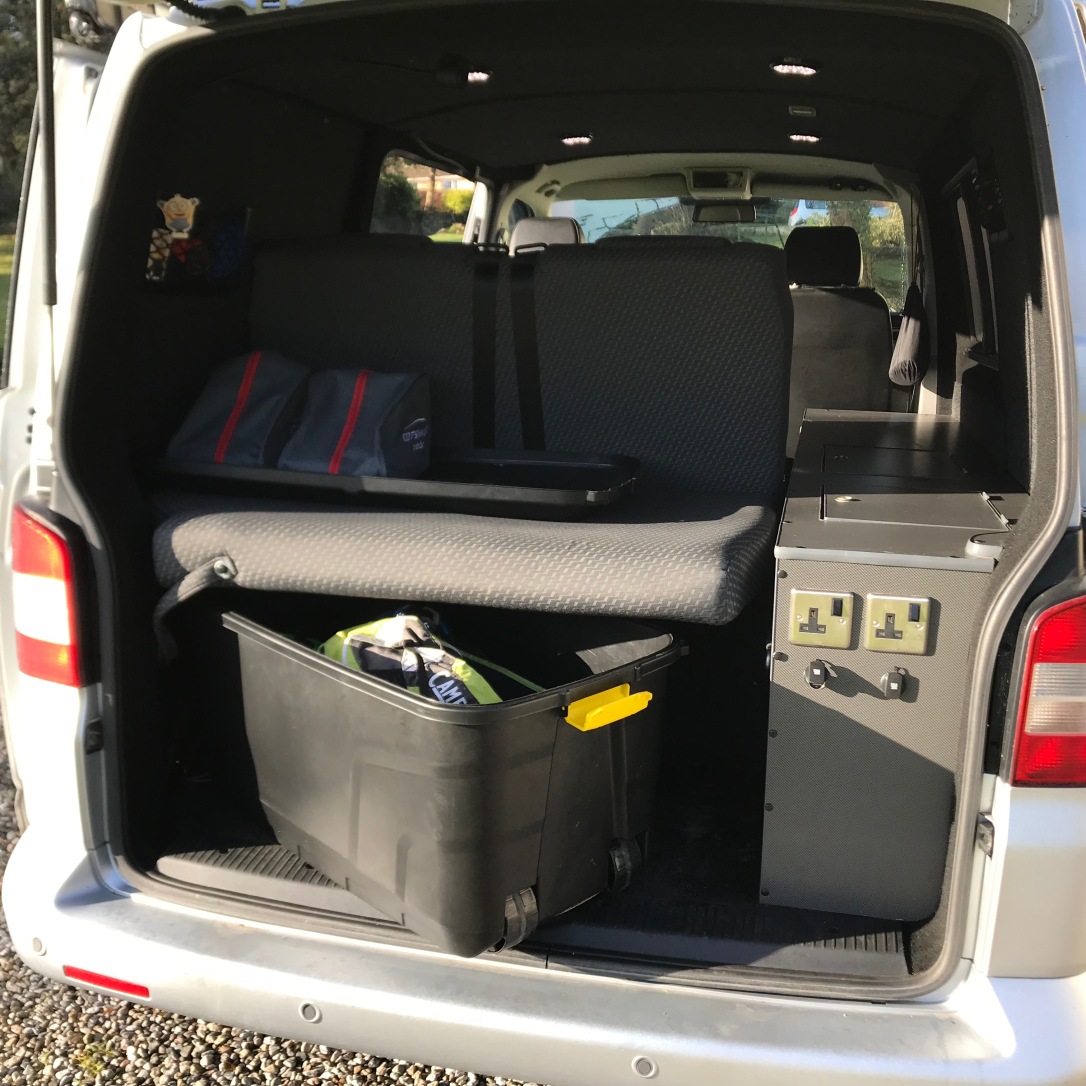
Plastic Boxes – sounds so simple but using containers to split down the load areas makes everything organised and easy to manage. I am especially delighted with my huge rear plastic storage box that fits perfectly in the gap below the rear seat shelf.
Wind Deflectors – a small investment again but these allow the windows to be left ajar in all weathers without fear of foul weather entering, allowing air circulation and easing condensation problems. Simple, priceless.
Cargo Net Holders – Another small but really useful change. The nature of my storage units leaves lots of bulkhead space above the seatline that has been made to work harder by screwing on a couple of simple cargo net storage kits. Simple, cheap, keeps things handy.
Waterproof Bed Cover – I had this custom made to protect the expensive RIB bed when loading wet boats and kit inside. Made by a sailmaker out of the material used for dinghy cockpit covers, this is effectively a rugged, waterproof fitted sheet for the bed.
Fitted Sheets – speaking of sheets, there are a number of companies online that will produce bespoke fitted bedding for unusual shaped beds. I ordered both a mattress topper and a pair of fitted sheets and these have served me well for 5 years now which allow the bed to be made quickly and mean the van bed feels similar to a bed at home.
Garage Flooring Set – this flexible flooring set was a real find. I already used them in the garage/adventure sports storeroom but it struck me they would be perfect for protecting the top of the units. Half an hour with a Stanley knife and I was right. Lots of potential applications…
I hope you are finding these blogs useful. If you have any questions about the changes made to the Dub please use the comments section below to get in touch and I will be happy to help.

I have RIB single seat/beds for the first time in my camper and don’t understand why as you sleep on the back of the seat they can’t make them softer, a topper is essential using up storage.
LikeLiked by 1 person
I agree, they could be even better; although my topper is very thin I have started looking at getting something more substantial which, as you say, will suck up storage space. I certainly seem to notice hard ridges where the folds are more and more – I don’t know if it because the seat is getting older or because I am getting older!
LikeLike